前文請看這裏
http://www.jasonworkshop.com/2016/06/20160615.html
上回講到透過 Arduino + DHT11 將取得的環境資料傳送到電腦的方法。
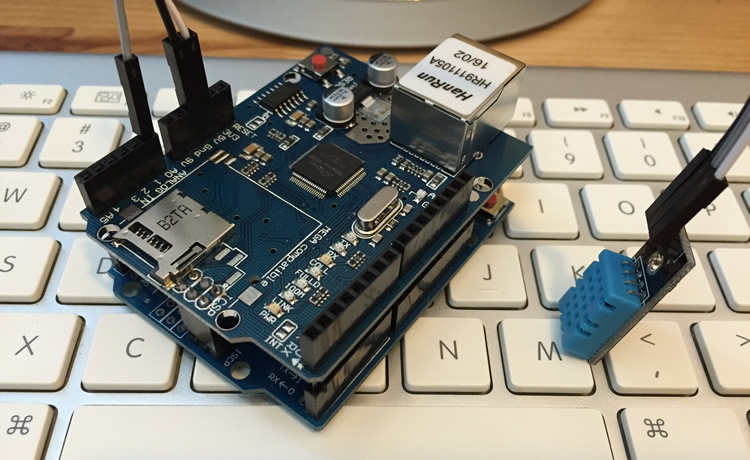
今次將會加入 Arduino Ethernet Shield,讓使用者可以即時在網頁上的看到溫度濕度狀況。
首先要準備一下材料:
Arduino UNO R3 x 1
Arduino Ethernet Shield x 1
DHT11 3-Pin Digital Temperature Humidity Sensor Module x 1
杜邦線 DuPont Cables x 適量
製作步驟如下:
[Part 1 硬件的準備工作]
首先將 Arduino UNO R3 與 Ethernet Shield 連結在一起;
將 DHT11 的 + 連接到 Ethernet Shield 的 5V 接腳;
將 DHT11 的 - 連接到 Ethernet Shield 的 GND 接腳;
將 DHT11 中間的 out 連接到 Ethernet Shield 的 A0 接腳。
[Part 2 下載 DHT11 Library]
硬件部份完成後就可以開始軟件方面的工作了,按此下載已預先準備好的 DHT11 Library
下載回來的 dht.zip 不用解壓,我們將會直接將這個 library 滙入 Arduino 的程式庫。
[Part 3 下 DHT11 Library 安裝到 Arduino IDE]
啟動 Arduino IDE,在 Menu 按「草稿碼」>「匯入程式庫」>「加入.ZIP程式庫」,然後選取剛下載回來的 dht.zip 便可。
[Part 4 編寫程式部份]
進入 Arduino IDE 並編寫下列程式碼:
--------------------------------------
#include <SPI.h> // Serial peripheral interface library
#include <Ethernet.h> // Ethernet shield library
#include <dht.h> // DHT11 library
#define dht_dpin A0 // 如果 DHT11 不是插在 A0 請自行修改合適的腳位
dht DHT; // 建立 dht 物件
byte mac[] = { 0xAA, 0xBB, 0xCC, 0xDD, 0xEE, 0xFF }; // Mac address
IPAddress ip(192, 168, 10, 123); // IP address
EthernetServer server(80); // Web server port number
void setup() {
Serial.begin(9600);
while (!Serial) {
}
// Start the ethernet connection and the server
Ethernet.begin(mac, ip);
server.begin();
Serial.print("server is at ");
Serial.println(Ethernet.localIP());
}
void loop() {
DHT.read11(dht_dpin); // 讀取 DHT11 的環境數據
EthernetClient client = server.available(); // listen for incoming clients
if (client) {
boolean currentLineIsBlank = true;
while (client.connected()) {
if (client.available()) {
char c = client.read();
if (c == '\n' && currentLineIsBlank) {
// http response header
client.println("HTTP/1.1 200 OK");
client.println("Content-Type: text/html");
client.println("Refresh: 5"); // 每隔 5 秒重新載入網頁一次
client.println();
client.println("");
client.println("");
// 顯示溫度
client.print("Temperature: ");
client.print(DHT.temperature);
client.print("C, ");
// 顯示濕度
client.print("Humidity: ");
client.print(DHT.humidity);
client.println("%");
client.println("");
break;
}
}
}
delay(1); // give the web browser time to receive the data
client.stop(); // close the connection
}
delay(5000); // 延時5秒,即變成每5秒收集一次環境數據
}
--------------------------------------
編寫程式碼後,記得修改合適的 IP Address,然後在 Menu 按「工具」>「板子」>選擇「Arduino/Genuino Uno」
並在 Menu 按「工具」>「序列埠」>選擇連接了 Arduino 的 Port
最後按編程視窗內的「上傳」將程式傳送到 Arduino 並執行,就可以在瀏覽器進入 Arduino 的 IP Address 看到環境溫度及濕度了!

