上年曾經為大家介紹如何製作「溫度濕度監測器」
http://www.jasonworkshop.com/2016/06/20160615.html
十多個月後回望這個 Project 在硬件體積有點大,軟件方面也有點複雜。
今次的「自製溫度濕度監測器」將會使用內置 WiFi 的單微板 Wemos D1 mini + 溫濕度感應器 DHT11 再配合線上 LoT 分析網站 ThingSpeak 來組成這個 Project。
大家有興趣的話也可以跟著做一個哦。
製作步驟如下:
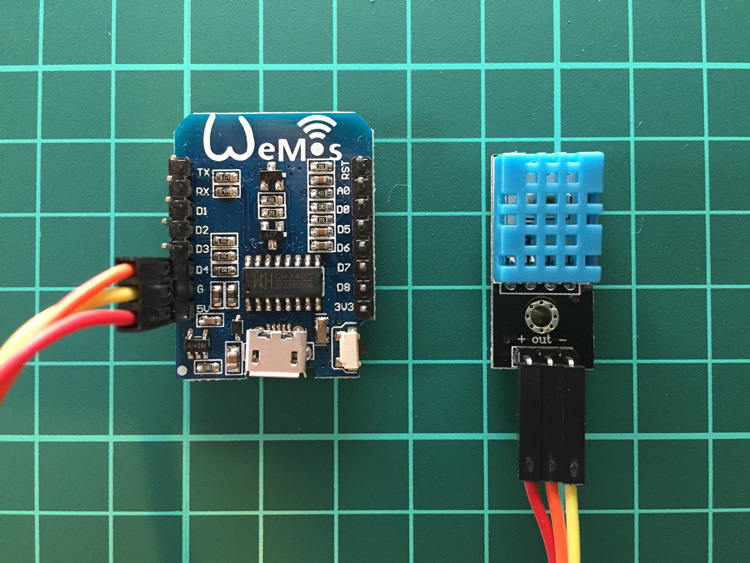
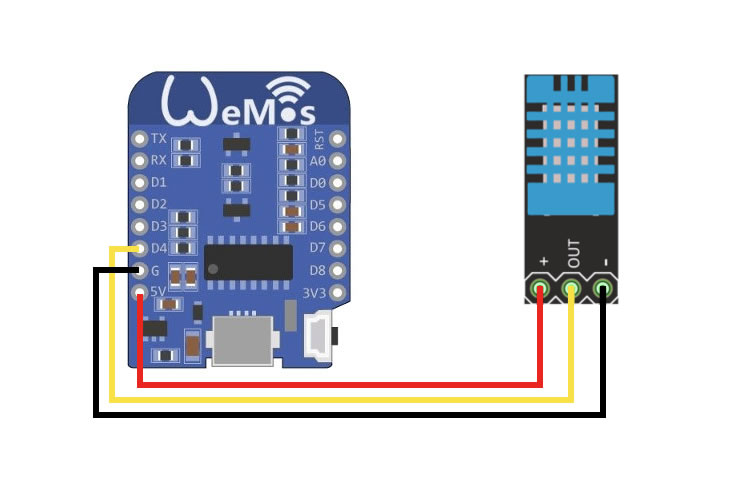
[Part 1 硬件的準備工作]
首先將 DHT11 的 + 連接到 Wemos 的 5V 接腳;
將 DHT11 的 - 連接到 Wemos 的 G 接腳;
將 DHT11 中間的 out 連接到 Wemos 的 D4 接腳。
[Part 2 安裝 Wemos D1 mini 驅動程式]
請到 https://wiki.wemos.cc/downloads 下載並安裝 Wemos D1 mini 的驅動程式。
[Part 3 安裝 Arduino IDE]
請到 https://www.arduino.cc/en/Main/Software 下載並安裝最新的 Arduino IDE。
[Part 4 在 Arduino IDE 加入 ESP8266 開發板]
在 Arduino \ Preferences \
在 Additional Boards Manager URLs 框框輸入 "http://arduino.esp8266.com/stable/package_esp8266com_index.json"
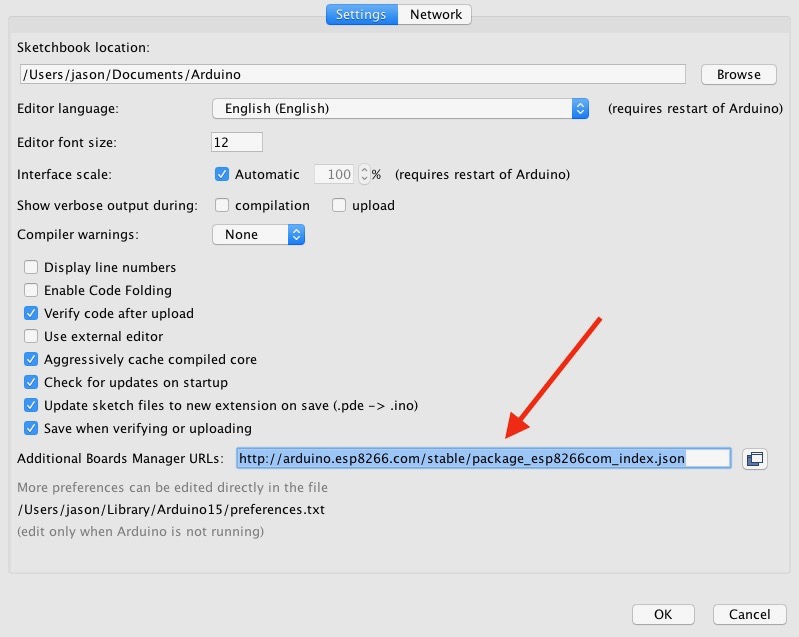
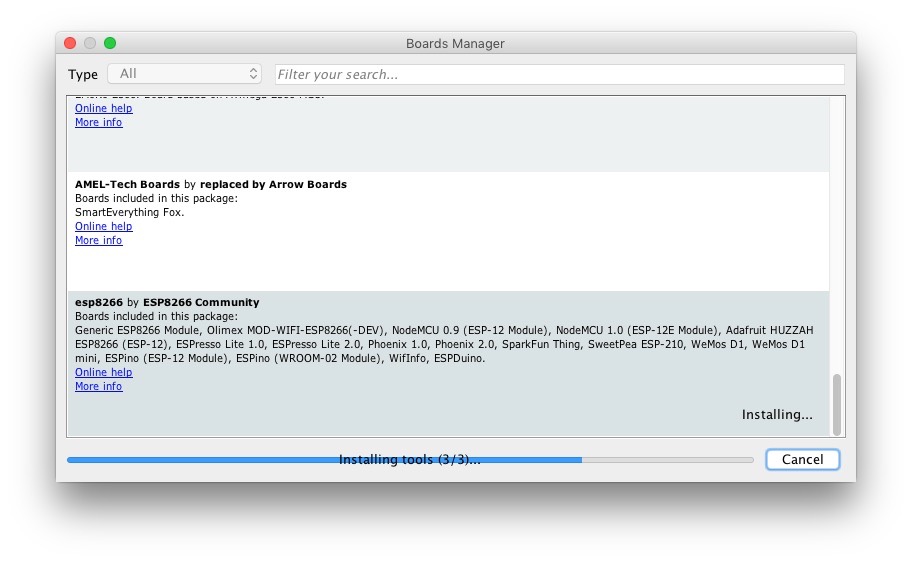
在 Arduino \ Board \ Boards Manager
選擇 "esp8266" 然後按 Install
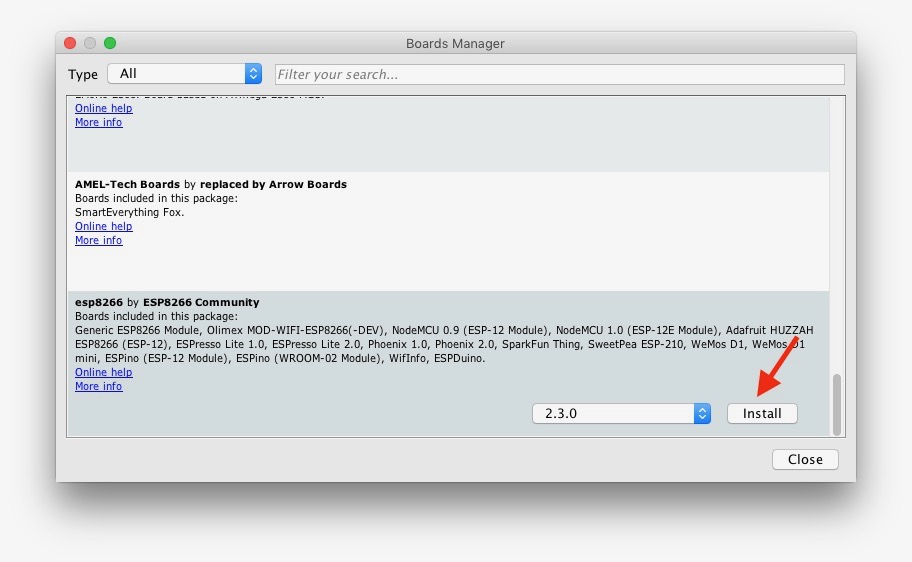
"Generic ESP8266 Module" 就會出現在 Board menu
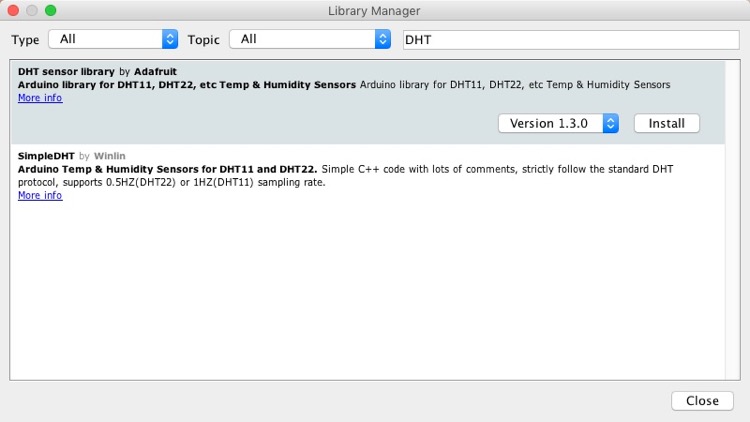
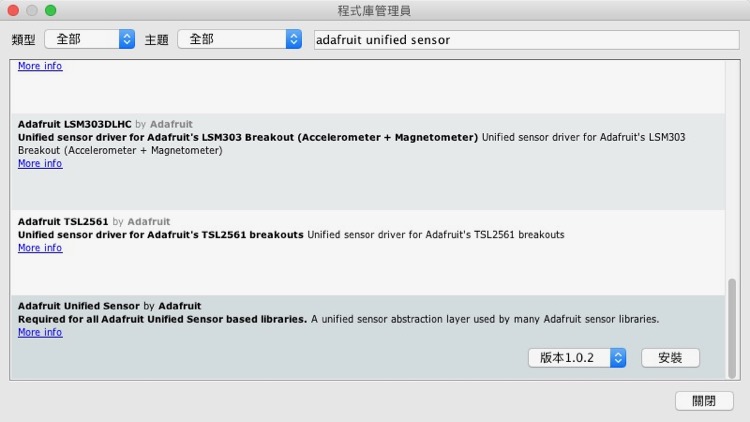
[Part 5 在 Arduino IDE 加入需要的 Library]
在 Arduino \ Sketch \ Include Library \ Manage Libraries
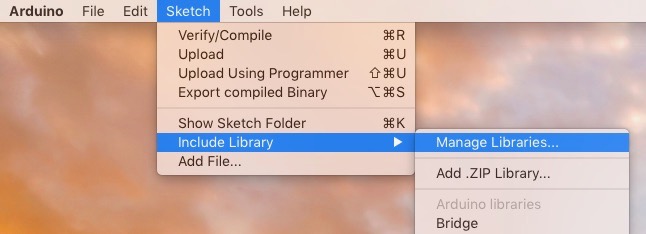
尋找並安裝 DHT Sensor library by Adafruit
尋找並安裝 Adafruit Unified Sensor by Adafruit
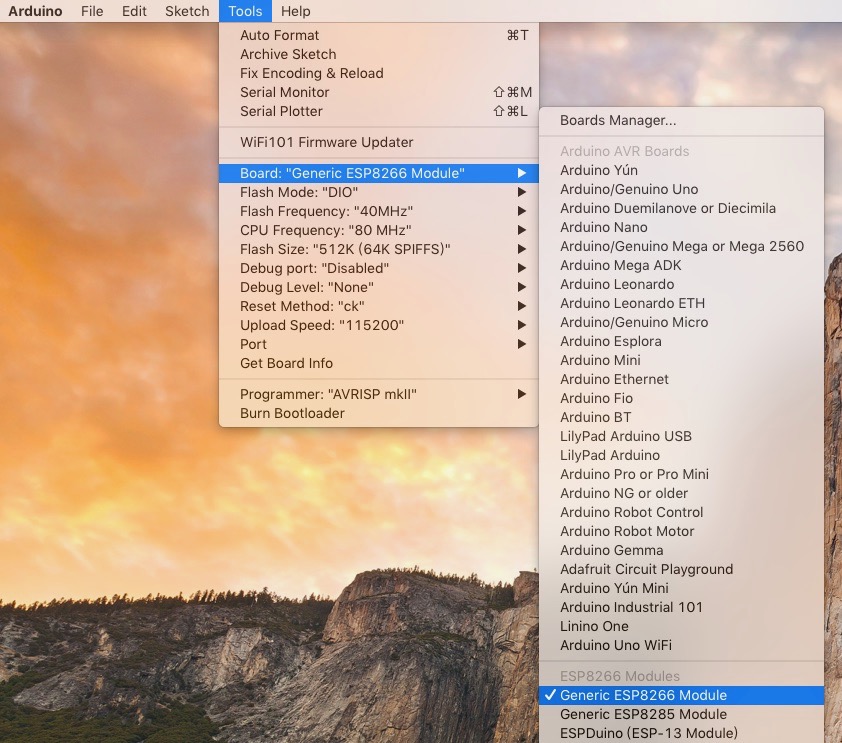
[Part 6 設定 Wemos D1 mini 的參數]
在 Arduino \ Tools
根據下圖修改 Wemos D1 mini 的參數

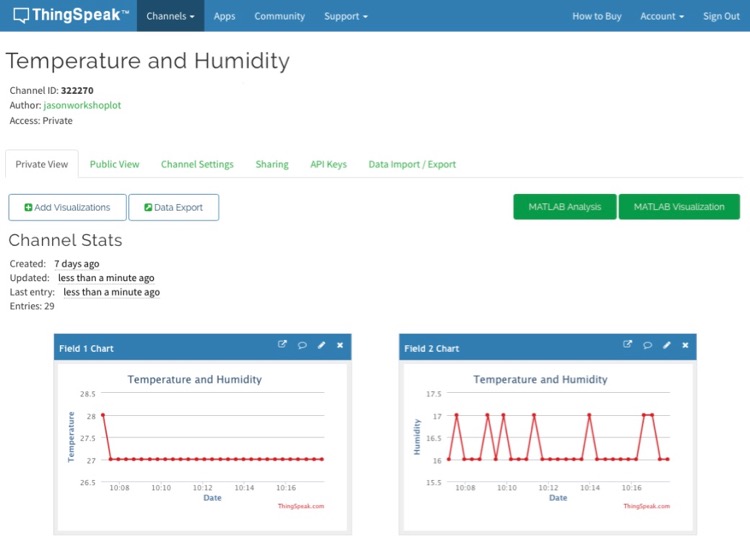
[Part 7 申請 ThingSpeak 並建立一個 Channel]
請先根據這篇教學申請 ThingSpeak 帳戶,然後建立一個 Channel 來放置收集回來的數據,並記下 Write API Key。
http://www.jasonworkshop.com/2017/08/20170828.html
[Part 8 編寫及上載程式]
請將以下程式碼複製到 Arduino IDE,注意請將 apiKey, ssid, password 修改成適合自己的,然後上載至 Wemos。
#include <DHT.h>
#include <ESP8266WiFi.h>
#define DHTPIN 2 // D4 = GPIO 2
#define DHTTYPE DHT11
// your thingspeak channel API key and your WiFi SSID and password
String apiKey = "Your Write API Key from ThingSpeak";
const char* ssid = "Your WiFi SSID";
const char* password = "Your WiFi Password";
const char* server = "api.thingspeak.com";
DHT dht(DHTPIN, DHTTYPE);
WiFiClient client;
void setup() {
Serial.begin(115200);
delay(50);
dht.begin();
WiFi.begin(ssid, password);
Serial.println();
Serial.println();
Serial.print("Connecting to ");
Serial.println(ssid);
WiFi.begin(ssid, password);
while (WiFi.status() != WL_CONNECTED) {
delay(500);
Serial.print(".");
}
Serial.println("");
Serial.println("WiFi connected");
}
void loop() {
float h = dht.readHumidity();
float t = dht.readTemperature();
if (isnan(h) || isnan(t)) {
Serial.println("Failed to read from DHT sensor!");
return;
}
if (client.connect(server,80)) {
String postStr = apiKey;
postStr +="&field1=";
postStr += String(t);
postStr +="&field2=";
postStr += String(h);
postStr += "\r\n\r\n";
client.print("POST /update HTTP/1.1\n");
client.print("Host: api.thingspeak.com\n");
client.print("Connection: close\n");
client.print("X-THINGSPEAKAPIKEY: "+apiKey+"\n");
client.print("Content-Type: application/x-www-form-urlencoded\n");
client.print("Content-Length: ");
client.print(postStr.length());
client.print("\n\n");
client.print(postStr);
Serial.print("Temperature: ");
Serial.print(t);
Serial.print(" degrees Celsius, Humidity: ");
Serial.print(h);
Serial.println(", Sending data to Thingspeak");
}
client.stop();
Serial.println("Waiting 20 secs"); // thingspeak needs at least a 15 sec delay between updates
delay(20000);
}
[Part 9 執行並測試成果
在 Arduino IDE 上載程式到 Wemos
當上載進度達 100% 時,溫度濕度監測器便會開始啟動。

大家可以按 Arduino \ Tools \ Serial Monitor 觀察運作情況。
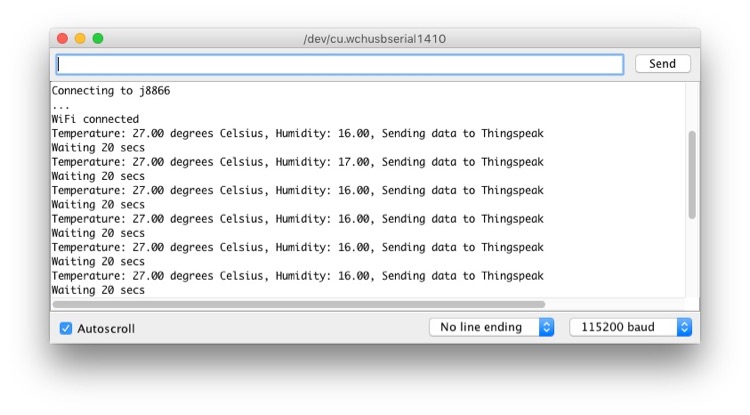
一齊正常的話,便可以在 ThingSpeak 的 Private View 看到已收集的數據所生成的圖表。